
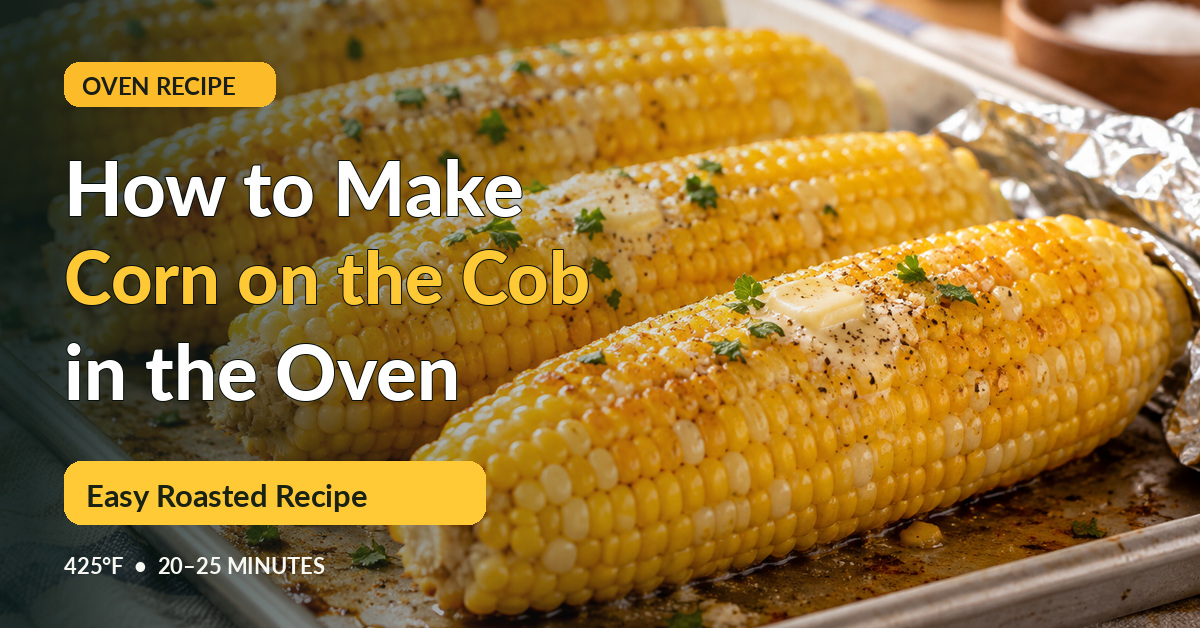

Learning how to make corn on the cob in the oven is simple. Remove the husks and silk, coat each ear with butter, wrap it in aluminum foil, and roast at 425°F (220°C) for approximately 20–25 minutes. The result is tender, juicy corn without boiling water or using an outdoor grill.
You can also roast corn uncovered for lightly browned kernels or leave the husks on for a moist, low-preparation method. This guide explains all three options, including cooking times, seasoning ideas, and ways to prevent dry or tough corn.
Oven Corn on the Cob at a Glance
| Recipe detail | Recommendation |
|---|---|
| Main method | Foil-wrapped oven roasting |
| Corn | 4 fresh ears of sweet corn |
| Preparation | Remove husks and silk |
| Butter | 4 tablespoons unsalted |
| Seasoning | Kosher salt, optional black pepper |
| Oven temperature | 425°F (220°C) |
| Cooking time | Approximately 20–25 minutes |
| Turning | Optional; once halfway is helpful |
| Doneness | Hot, juicy, tender kernels |
| For browning | Unwrap and finish uncovered |
| Servings | 4 |
| Total time | Approximately 25–35 minutes |
These times assume medium-sized fresh ears in a fully preheated oven. Larger ears or crowded baking sheets may require additional cooking time.
What Is the Best Corn for Oven Roasting?
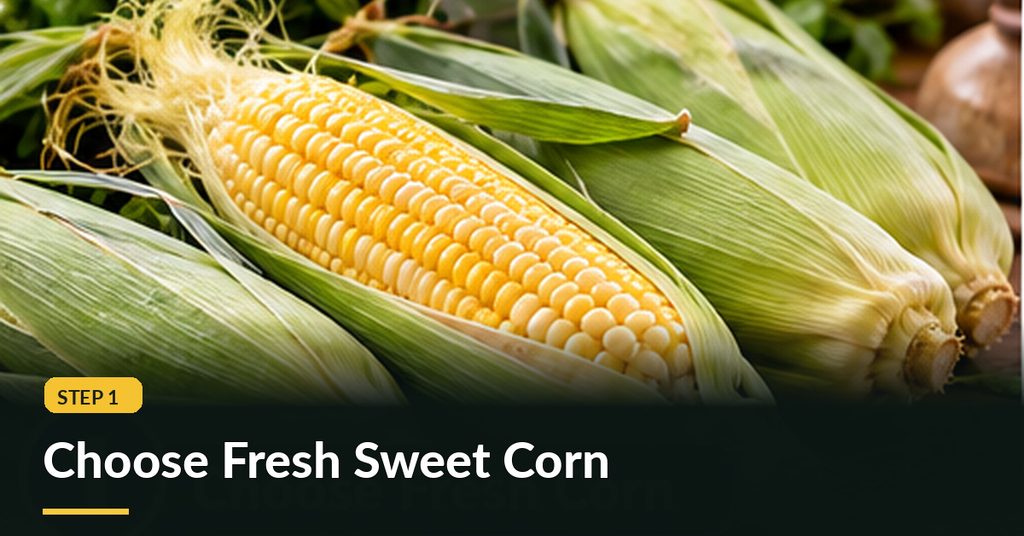
Fresh sweet corn is the ideal choice because its naturally juicy kernels become tender with relatively little cooking.
When buying corn, look for green, fresh-looking husks that fit closely around the ear. The cob should feel full and firm, and any visible kernels should appear plump. Avoid ears with moldy silk, damaged husks, or visibly dried-out kernels.
You do not need to peel open every ear at the grocery store. Feeling the cob through its husk can help you judge whether the kernels have developed evenly.
Yellow, white, and bicolor sweet corn all roast successfully. Kernel color alone does not determine sweetness. Variety, freshness, growing conditions, and storage play more important roles.
For the best flavor, refrigerate fresh corn promptly and cook it soon after buying.
Ingredients and Equipment for Oven-Roasted Corn
The basic recipe needs just three ingredients:
- 4 ears fresh sweet corn: Choose medium-sized ears with full kernels.
- 4 tablespoons unsalted butter: Approximately 1 tablespoon per ear, enough to coat the kernels evenly.
- Kosher salt: Add to taste.
Freshly ground black pepper is optional.
You will also need aluminum foil, a rimmed baking sheet, oven mitts, and kitchen tongs.
Softened butter is easy to spread directly onto the corn. Melted butter also works, although some may collect in the foil packets.
If you prefer dairy-free corn, substitute olive oil, avocado oil, or plant-based butter.
How to Make Corn on the Cob in the Oven
This foil-wrapped method is the easiest starting point for home cooks who want consistently moist, buttery corn.
Step 1: Preheat the oven
Set the oven to 425°F (220°C) and position a rack near the middle. Allow the oven to reach the selected temperature before adding the corn.
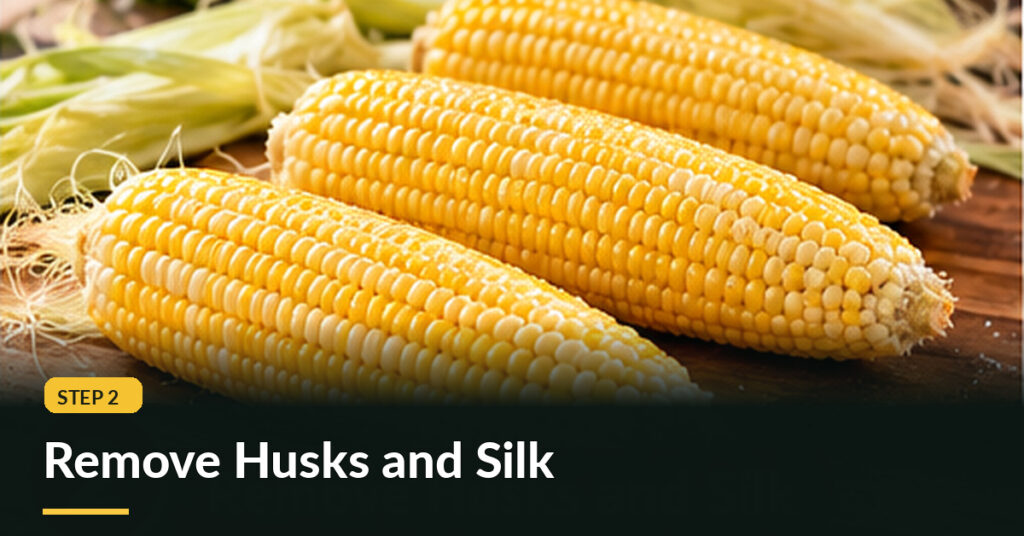
Step 2: Remove the husks and silk
Pull the green husks downward and remove them from the base. Take away the silk strands, using clean fingers or a clean kitchen towel for any stubborn pieces.
Trim the tough stem if necessary. Inspect the corn for damaged kernels.
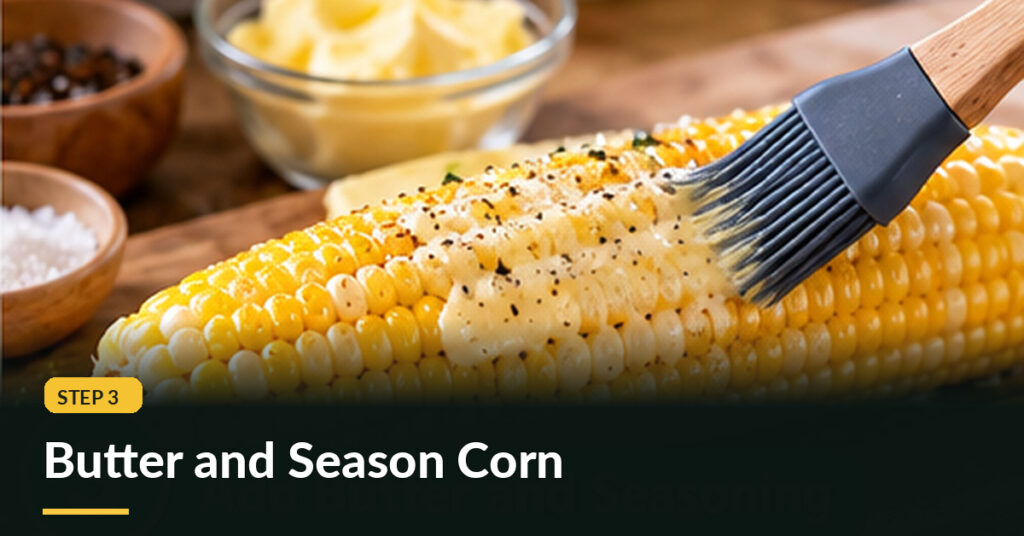
Step 3: Coat the corn with butter
Spread approximately 1 tablespoon of softened butter over each cob. Turn the corn as you work so the butter reaches all sides.
Use an even coating rather than piling butter onto one section.
Step 4: Add seasoning
Sprinkle the corn lightly with kosher salt. Add a little black pepper if desired.
Keep the seasoning simple for the first batch. Additional flavors can be added after cooking.
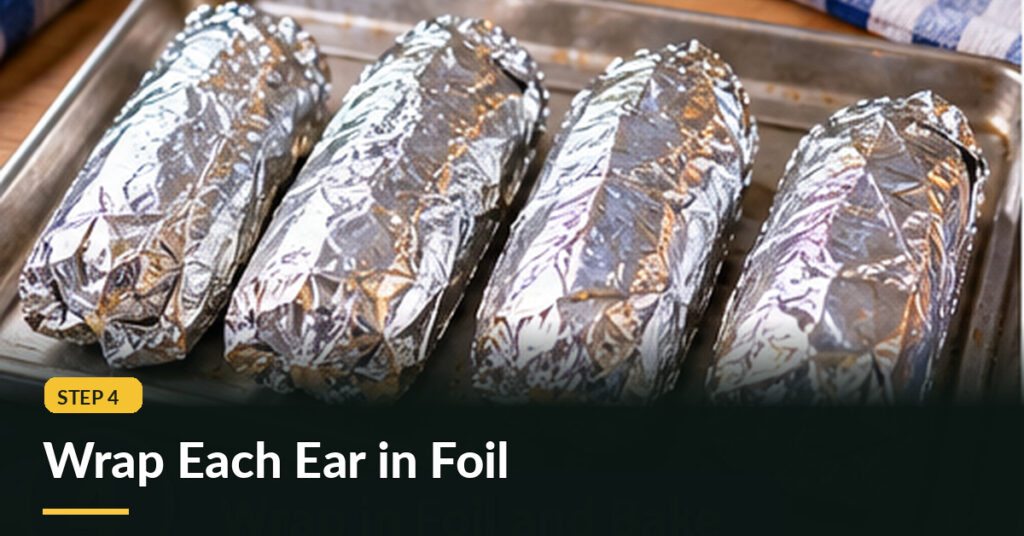
Step 5: Wrap each ear in foil
Place each buttered cob on its own sheet of aluminum foil.
Fold the foil around the corn and seal the edges securely enough to help retain moisture. Avoid unnecessary extra layers.
Step 6: Arrange the corn
Place the wrapped ears in a single layer on a rimmed baking sheet, leaving a little space between them.
The pan helps catch any melted butter that escapes during roasting.
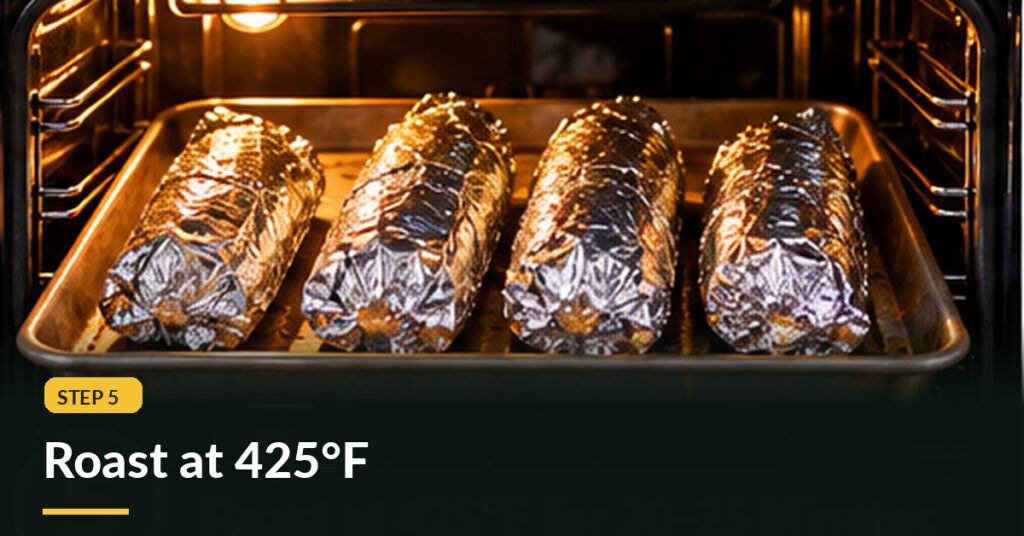
Step 7: Roast for 20–25 minutes
Transfer the baking sheet to the oven.
Roast for approximately 20–25 minutes. Turning the packets once halfway through can help distribute heat and melted butter, although it is not essential.
Step 8: Check for tenderness
Carefully open one packet, keeping your hands and face away from escaping steam.
Pierce a kernel with a fork or the tip of a knife. It should be tender, hot, and juicy.
If the corn is still firm, reseal the packet and continue roasting in approximately 5-minute increments.
Step 9: Add optional browning
For lightly roasted spots, remove the foil after the corn becomes tender and return the cobs to the oven uncovered for a few minutes.
A brief broiler finish is another option, but it requires constant supervision and a broiler-safe pan.
Step 10: Serve warm
Transfer the corn to a serving platter. Add a little more butter if desired, taste for salt, and serve while hot.
Should You Remove the Husk Before Baking Corn?
Both shucked and husk-on corn work in the oven, but they produce slightly different results.
Removing the husks makes it easier to apply butter, inspect the kernels, and add browning. It is the preferred preparation for the main foil-wrapped recipe.
Leaving the husks on reduces preparation work and protects the kernels from direct oven heat. The husk creates a moist cooking environment, although it will not produce the same surface browning as uncovered roasting.
If you want buttery, seasoned corn, shuck it first. If convenience matters most, roasting in the husk is a useful alternative.
Corn on the Cob in Foil vs Without Foil
Foil changes how the corn cooks because it holds moisture and melted butter close to the kernels.
| Feature | Foil-wrapped corn | Uncovered corn |
|---|---|---|
| Texture | Moist and tender | More roasted surface |
| Browning | Minimal | More noticeable |
| Moisture retention | Higher | Lower |
| Turning | Optional | Recommended |
| Best for | Juicy, buttery corn | Golden roasted kernels |
| Main concern | Little surface color | Drying if overcooked |
Neither method is universally better.
For a moist result, keep the corn wrapped. For a more roasted finish, expose the kernels to direct oven heat.
How to Roast Corn on the Cob Without Foil
Uncovered roasting is particularly useful when you want golden kernels and do not want to wrap individual ears.
- Preheat the oven to 400°F (205°C).
- Remove the husks and silk.
- Brush the corn lightly with olive oil or another cooking oil, then season.
- Arrange the ears on a baking sheet in a single layer.
- Roast for approximately 15–20 minutes, turning every 5 minutes or as needed for even color.
- Remove the corn once the kernels are tender and lightly golden.
Watch the corn during the final minutes. Uncovered kernels lose moisture more readily, so extending the cooking time simply to create darker spots may leave them chewy.
For a buttery finish, brush with melted butter after roasting.
How to Bake Corn in the Husk
For an especially simple method, you can bake whole ears without removing the husks first.
- Preheat the oven to 350°F (175°C).
- Remove loose, damaged outer leaves and trim excessive dry silk.
- Place the ears, still in their husks, directly on the middle oven rack.
- Roast for approximately 30 minutes, or until the corn is tender.
- Remove carefully with oven mitts or tongs.
- Allow the corn to cool slightly, then peel back the hot husks and remove the silk.
Finish with butter and salt.
The husk acts as a natural wrapper that helps keep moisture near the kernels. Soaking the husks beforehand is not required for this particular oven method.
What Is the Best Oven Temperature for Corn on the Cob?
There is no single temperature that works best for every roasting method.
At 400°F (205°C): Uncovered corn can develop golden spots in roughly 15–20 minutes when turned regularly. Foil-wrapped recipes may take around 25 minutes.
At 425°F (220°C): Foil-wrapped fresh corn generally becomes tender in approximately 20–25 minutes. This is the recommended temperature for the main recipe.
At 450°F (230°C): Some foil-wrapped methods also use approximately 20–25 minutes. The higher setting does not guarantee more browning while the corn remains sealed.
Husk-on roasting is commonly performed at a lower temperature, around 350°F (175°C).
The cooking method and ear size matter as much as the oven setting.
How Do You Know When Corn on the Cob Is Done?
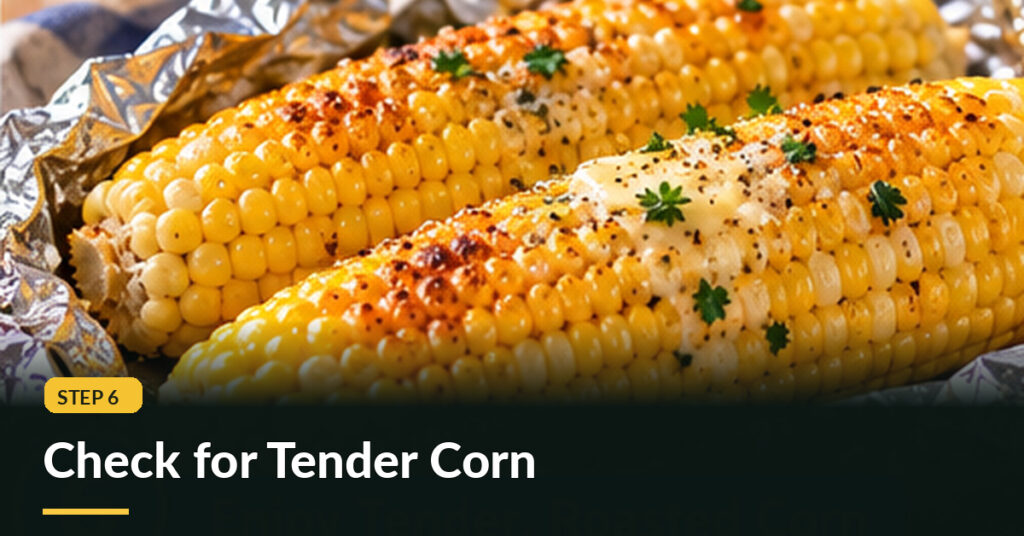
Properly cooked sweet corn should have plump, juicy kernels that are hot throughout and easy to pierce.
Taste one or two kernels after allowing them to cool enough to eat safely. They should be tender, with a pleasant bite rather than a hard or doughy center.
Avoid cooking until the kernels become deeply wrinkled, shriveled, or mushy.
Fresh corn does not have a mandatory meat-style minimum internal cooking temperature. Use tenderness, temperature to the touch, and appearance to judge cooking doneness.
If the corn remains hard after extra roasting, the ears may be unusually large, insufficiently heated, or overmature.
How to Get Browned or Slightly Charred Corn in the Oven
Because foil holds moisture around the corn, it does not create the same browning as direct roasting.
For extra color, try one of these techniques:
- Unwrap near the end: Once tender, return the corn uncovered for several minutes.
- Roast uncovered from the beginning: Use the 400°F method and turn the ears regularly.
- Finish under the broiler: Place tender corn on a broiler-safe pan and broil briefly, rotating with tongs.
Watch continuously when broiling. Kernels and butter can brown rapidly under intense top heat.
Aim for golden kernels with a few lightly charred spots, not widespread blackening.
Butter vs Olive Oil: Which Is Better?
Butter gives oven-roasted corn its familiar rich flavor. It also helps salt and other seasonings cling to the kernels.
Olive oil and neutral cooking oils are useful alternatives, especially for dairy-free meals.
For foil-wrapped corn, butter works particularly well because the foil keeps it close to the kernels.
For uncovered roasting at higher temperatures, oil is convenient because it avoids the risk of butter’s milk solids scorching on exposed surfaces.
You can also roast corn without added fat, especially when using the husk-on method.
Can You Roast Several Ears of Corn at Once?
Yes. Oven roasting is convenient when preparing corn for a family dinner or small gathering.
Four to eight ears can often be cooked using one or more appropriately sized baking sheets, depending on the size of your oven and pans.
Keep the ears in a single layer where practical. Avoid stacking packets into a deep pile.
When using multiple trays, rotate their positions for more even heating.
Larger batches may take a little longer because the oven needs time to recover heat and circulate hot air. Check tenderness rather than assuming every batch finishes in exactly 25 minutes.
Can You Make Oven Corn with Frozen Corn on the Cob?
Frozen corn on the cob can be cooked in the oven, but its cooking time may differ from fresh corn.
Ice and additional surface moisture affect how quickly the kernels heat. Do not assume frozen ears will be ready in the same 20–25-minute window as fresh ones.
For a straightforward approach, follow the package’s oven instructions when available.
Alternatively, thaw the corn safely in the refrigerator, pat off excess moisture, and use the foil-wrapped method, checking its tenderness carefully.
Avoid leaving frozen corn at room temperature for prolonged thawing.
Easy Seasoning Variations for Roasted Corn
Once you know the basic method, changing the flavor is simple.
Garlic butter corn: Mix softened butter with a small amount of finely grated garlic and chopped parsley. For uncovered roasting, add garlic butter near the end so the garlic does not burn.
Chili lime corn: Finish cooked corn with butter or olive oil, chili powder, fresh lime juice, and salt. Add cilantro if desired.
Parmesan herb corn: Sprinkle hot corn with finely grated Parmesan, chopped parsley, and black pepper.
Elote-inspired corn: After roasting, spread a little mayonnaise or Mexican crema over the kernels, then add cotija cheese, lime, chile powder, and cilantro.
These are optional finishes. Fresh, sweet corn tastes excellent with butter and salt alone.
Why Is My Oven-Roasted Corn Dry, Hard, or Mushy?
Several common problems can affect the finished texture.
Corn is still hard: The ears may be large, the oven may be running cool, or the cooking time may be insufficient. Roast for another five minutes and check again.
Corn is dry or chewy: Excessive cooking, especially without foil, can remove too much moisture. Check earlier next time and use foil or husks for a juicier result.
Corn is mushy or watery: Overcooking or prolonged steaming may soften the kernels too much. Stop roasting as soon as they become tender.
Corn is not browning: Foil blocks direct browning. Unwrap the corn and finish it briefly under direct oven heat.
Butter leaks onto the pan: Seal packets more carefully and use a rimmed baking sheet.
Garlic tastes bitter: Fresh minced garlic may have burned. Add it toward the end of uncovered roasting or after cooking.
The most important rule is to stop cooking when the kernels reach the texture you want.
Oven-Roasted Corn vs Boiled or Grilled Corn
Each cooking method has its advantages.
Oven roasting requires no large pot and makes batch preparation convenient. With direct roasting or broiling, it can also create some browned spots.
Boiling is fast and produces moist, tender corn but does not normally brown the kernels.
Grilling offers stronger char and potentially smoky flavors through direct heat. However, it requires a grill and more attention to hot spots.
Choose oven roasting when you want an easy indoor method with flexible moisture and browning options.
Can You Prepare Corn Ahead of Time?
You can remove the husks and silk ahead of cooking and refrigerate the cleaned ears in a covered container or food-safe bag.
Flavored butter can also be mixed in advance.
If you assemble buttered foil packets before dinner, keep them refrigerated until ready to roast.
For the best texture and juiciness, cook the corn relatively close to serving time rather than holding it hot for an extended period.
How to Store and Reheat Leftover Corn on the Cob
Allow cooked corn to cool briefly, then refrigerate it promptly in a covered container.
According to USDA food-safety guidance, refrigerate cooked leftovers within two hours, or within one hour when the surrounding temperature exceeds 90°F (32°C).
Store leftovers at 40°F (4°C) or below and use them within 3–4 days.
To reheat corn in the oven:
- Preheat to 350°F (175°C).
- Wrap each cooked cob in foil.
- Add approximately 1 teaspoon of water if the kernels seem dry.
- Heat until thoroughly hot. Some recipes suggest an initial 5–7 minutes, but refrigerated, large, or multiple ears may need longer.
- For leftover food safety, reheat to 165°F (74°C).
You can also slice the kernels from cooled cobs and add them to salads, soups, tacos, pasta, or grain bowls. Cut downward on a stable board, keeping your hands clear of the knife.
Common Mistakes to Avoid When Baking Corn
Choosing very old corn can produce disappointing results even with careful roasting. Start with fresh, full ears whenever possible.
Remove the silk thoroughly, but avoid damaging kernels while cleaning.
Do not use excessive butter or salt. A thin coating of butter and a light initial seasoning are enough.
Keep foil packets properly closed when moisture retention is the goal, and do not expect sealed corn to develop substantial char.
For uncovered roasting, turn the ears and check regularly. Never leave broiling corn unattended.
Finally, handle hot foil packets and husks carefully. Trapped steam can escape suddenly and cause burns.
Easy Oven-Roasted Corn on the Cob Recipe Card
Recipe: Easy Oven-Roasted Corn on the Cob
| Detail | Amount |
|---|---|
| Servings | 4 |
| Preparation time | 5–10 minutes |
| Cooking time | 20–25 minutes |
| Total time | Approximately 25–35 minutes |
| Oven temperature | 425°F (220°C) |
| Method | Individual foil packets |
Ingredients
- 4 medium ears fresh sweet corn
- 4 tablespoons unsalted butter, softened
- Kosher salt, to taste
- Black pepper, optional
Instructions
- Preheat the oven to 425°F (220°C).
- Remove husks and silk from the corn.
- Spread approximately 1 tablespoon butter over each cob.
- Season lightly with salt and optional black pepper.
- Wrap each ear individually in aluminum foil.
- Place the packets on a rimmed baking sheet.
- Roast for approximately 20–25 minutes.
- Carefully unwrap one packet and test the kernels for tenderness.
- Continue roasting briefly if needed.
- For browned kernels, finish uncovered or under a closely supervised broiler.
- Serve hot with additional seasoning if desired.
Recipe notes: Large ears may need more time. Turning the packets once is optional. Foil helps retain moisture but does not create significant browning.
Frequently Asked Questions
How long do you cook corn on the cob in the oven?
For medium fresh ears wrapped in foil, allow approximately 20–25 minutes at 425°F (220°C). Corn roasted uncovered may take around 15–20 minutes at 400°F (205°C), while husk-on corn commonly takes about 30 minutes at 350°F (175°C). Always check tenderness before serving.
What temperature should you bake corn on the cob?
A temperature of 425°F (220°C) is a practical choice for buttered, foil-wrapped fresh corn. Uncovered corn can roast at 400°F (205°C), while a husk-on method works at 350°F (175°C). The preferred temperature depends on whether you want moisture retention or greater surface browning.
Do you have to wrap corn in foil when baking it?
No. Foil is optional. It helps retain moisture and keeps butter close to the kernels, producing a tender result with limited browning. You can roast shucked corn directly on a baking sheet or leave it in its natural husk instead.
Do you have to boil corn before roasting it?
No. Fresh corn can go directly into the oven after preparation. Boiling beforehand is unnecessary for the foil-wrapped, uncovered, and husk-on methods described here. Starting with raw corn also avoids using an extra pot and cooking step.
Should you butter corn before or after roasting?
Either approach works. Adding butter before foil-wrapped roasting distributes flavor during cooking, while butter added afterward gives a fresh, rich finish. For uncovered high-temperature roasting, adding butter near the end is helpful if you want to avoid scorching the milk solids.
Do you need to turn corn while it roasts?
Turning foil-wrapped corn halfway through cooking is helpful but not essential. Uncovered corn benefits from regular turning because different surfaces brown at different rates. Some husk-on oven methods require no turning at all.
How can you tell when oven-roasted corn is done?
The kernels should be hot, juicy, tender, and easy to pierce with a fork. They should not have a hard, doughy center or appear shriveled from excessive cooking. Test one or two kernels once they are cool enough to taste safely.
Can you cook frozen corn on the cob in the oven?
Yes, but the timing may differ from fresh corn. Follow the frozen product’s cooking instructions when possible. If thawing first, use the refrigerator, remove excess moisture, and roast while checking tenderness rather than relying on a fixed fresh-corn cooking time.
How do you make corn slightly charred in the oven?
Roast shucked corn uncovered and turn it as needed, or finish already tender corn briefly under a broiler. The broiler should be used with a suitable pan and constant supervision. A few golden-brown or lightly charred spots are enough to give the corn a roasted finish.
How do you reheat oven-roasted corn without drying it out?
Wrap cooked corn in foil with a little water or butter and place it in a 350°F (175°C) oven. Heating time depends on the size, amount, and starting temperature of the corn. Reheat leftovers thoroughly to 165°F (74°C) for food safety.
Conclusion
Knowing how to make corn on the cob in the oven gives you an easy indoor side dish for everyday meals. Start with fresh sweet corn, remove the husks and silk, spread on butter and salt, and wrap each cob in foil. Roast at 425°F (220°C) for approximately 20–25 minutes, checking until the kernels are tender.
For more browned kernels, finish uncovered. For even less preparation, roast corn in its husk. Whichever method you choose, use freshness and tenderness—not the timer alone—to guide the result.
