
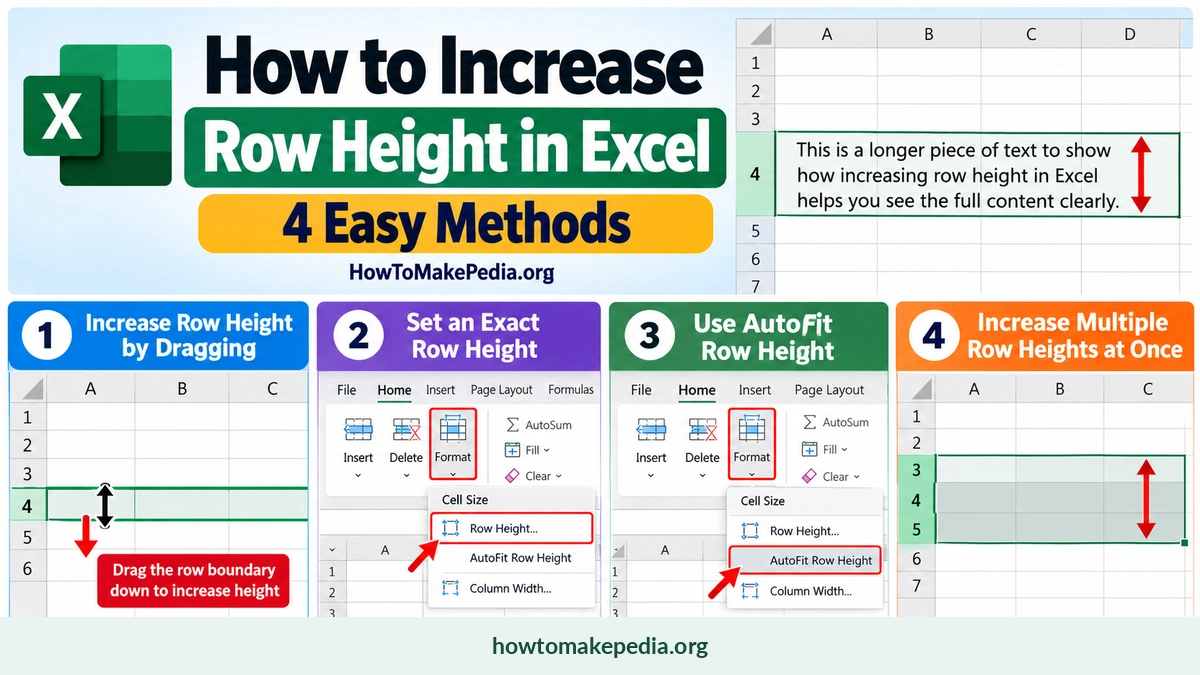

To increase row height in Excel, move your mouse to the bottom border of a row number, then click and drag downward. If you need an exact size, right-click the row number, select Row Height, and enter a value.
You can also use AutoFit to make rows fit their contents or resize several rows together. This guide explains each method, including how to fix common row-height problems in Windows, Mac, and Excel for the web.
Quick Answer: How to Increase Row Height in Excel
The fastest way to make a row taller is to drag its bottom boundary.
- Open your Excel worksheet.
- Find the row you want to resize.
- Move your pointer to the bottom edge of its row number.
- Wait until the pointer becomes a vertical double-headed arrow.
- Click and drag the boundary downward.
- Release the mouse when the row reaches your preferred height.
Quick tip: Double-click that same boundary if you want Excel to automatically adjust the height to fit the contents.
What Is Row Height in Excel?
Row height controls how much vertical space each row occupies in an Excel worksheet.
Rows run horizontally and are identified by numbers, while columns run vertically and are identified by letters.
For example, suppose you’re creating a customer service spreadsheet. Column C contains detailed customer comments, but row 4 isn’t tall enough to display the entire note.
Increasing row 4’s height creates more space for the comment.
Adjusting row height can improve:
- Readability of long descriptions
- Visibility of wrapped text
- Spacing between records
- Formatting of headings
- Appearance of business reports
Changing row height only affects the worksheet’s layout. It doesn’t delete data, change stored values, or alter formulas.
Method 1: Increase Row Height by Dragging
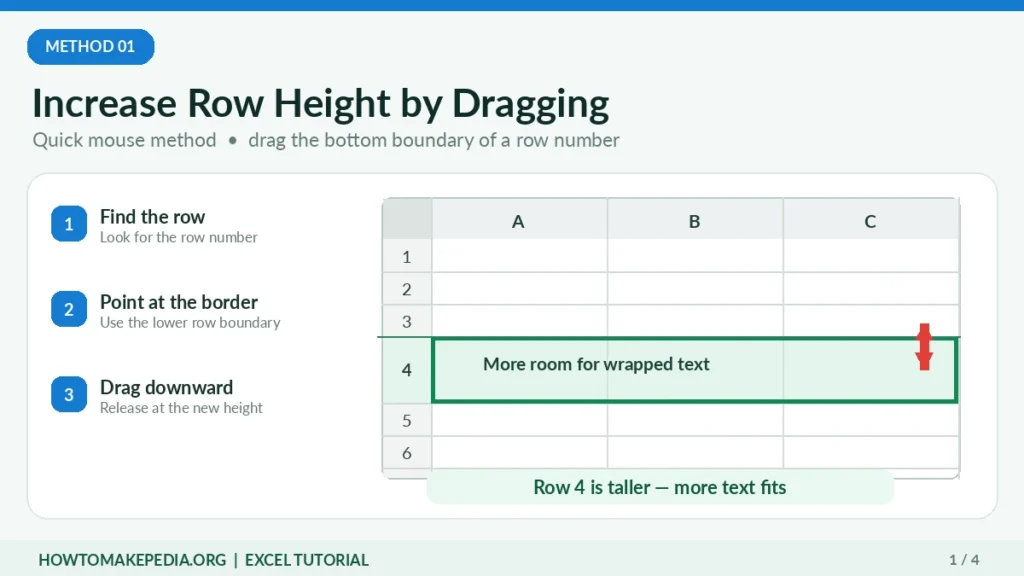
Dragging is the simplest method when you want to make one row taller without entering a specific measurement.
Steps to Increase Row Height Manually
- Open your workbook in Microsoft Excel.
- Locate the row you want to resize.
- Move your pointer to the bottom border of its row heading.
- Wait for the resize pointer to appear.
- Hold down the left mouse button.
- Drag the boundary downward.
- Release the mouse when the row looks right.
Example: Making a Customer Note Visible
Imagine cell B4 contains:
“The customer requested a replacement because the original package arrived damaged.”
If the cell uses Wrap Text, the message may occupy several lines. A short row might hide part of it.
Dragging the bottom boundary of row 4 downward gives the wrapped text more space.
You can also drag the boundary upward to make the row shorter.
Best for: Quick adjustments to individual rows when an exact measurement isn’t necessary.
Method 2: Set an Exact Row Height in Excel
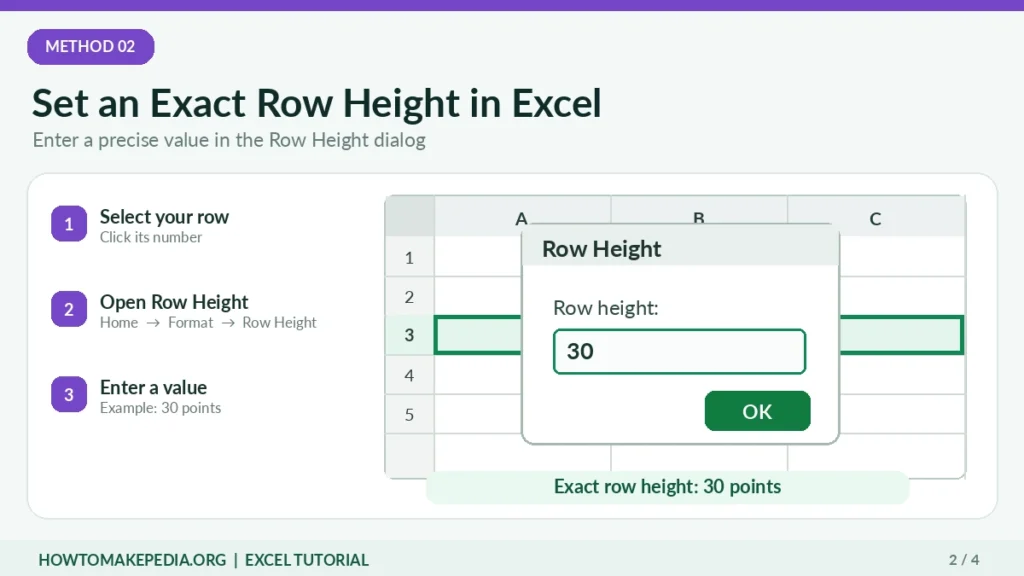
Sometimes you need several rows to have consistent spacing, especially when preparing invoices, attendance sheets, or business reports.
Excel allows you to enter an exact row height.
Steps to Set a Specific Height
- Select the row you want to change.
- Right-click its row number.
- Select Row Height.
- Enter a value, such as
30. - Click OK.
You can also use the Ribbon:
Home → Format → Row Height
For example, a row set to 30 points will be taller than a standard 15-point row.
What Unit Does Excel Use for Row Height?
In Normal view, Excel measures row height in points rather than simply using pixels.
Microsoft documents a standard default of 15 points and a maximum of 409 points. The actual starting height may vary with workbook fonts and settings.
In Page Layout view, you can work with measurement units such as inches or centimeters.
Best for: Reports where several rows need matching heights.
Method 3: Use AutoFit Row Height
AutoFit is useful when your worksheet contains long notes, addresses, or product descriptions.
Instead of guessing how tall a row needs to be, Excel calculates an appropriate height based on the visible contents.
How to AutoFit Row Height
- Select the row or rows you want to adjust.
- Open the Home tab.
- Click Format in the Cells group.
- Choose AutoFit Row Height.
- Check whether the complete contents are visible.
There’s also a faster option.
Move your pointer to the bottom boundary of the row heading and double-click it.
Excel adjusts the row height automatically.
Example: AutoFit a Customer Feedback Column
Suppose your worksheet contains customer reviews.
Some reviews take one line, while others take four or five lines.
After enabling Wrap Text, select the relevant rows and apply AutoFit Row Height.
Each row can adjust to its own contents instead of using the same height for every review.
AutoFit may increase or decrease a row’s height depending on the content.
Best for: Worksheets containing text of different lengths.
Method 4: Increase Multiple Row Heights at Once
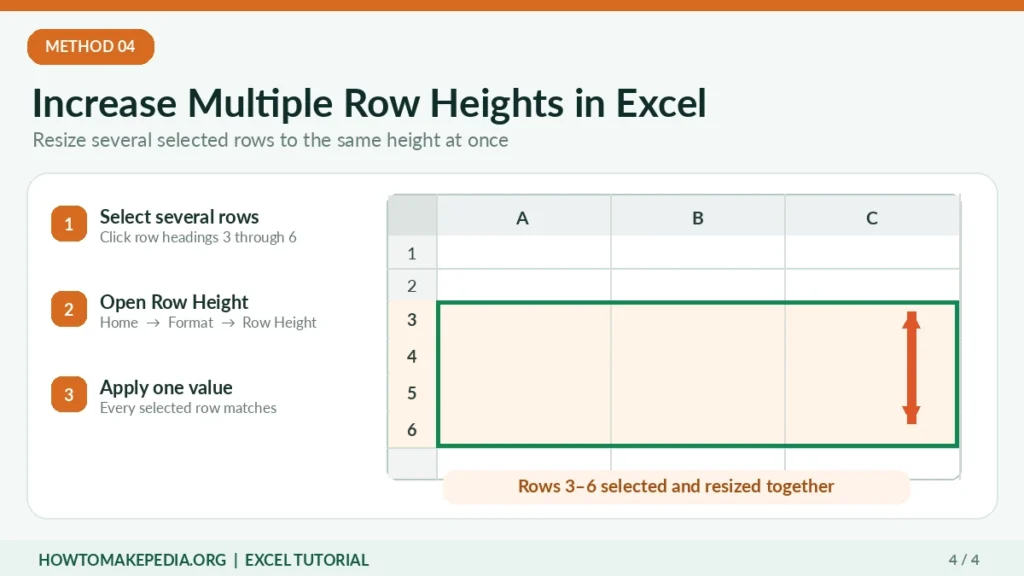
You don’t need to resize every row individually. Excel allows you to adjust several rows together.
Resize Consecutive Rows
- Click the heading of the first row.
- Hold Shift and click the heading of the last row you want to select.
- Move your pointer to the bottom boundary of a selected row.
- Drag downward.
- Release the mouse.
All selected rows receive the same height.
You can also select the rows and enter a specific value through Home → Format → Row Height.
On Windows, you can select nonadjacent row headings by holding Ctrl while clicking them.
Change the Height of All Rows in Excel
To make every worksheet row the same height:
- Click the Select All button in the upper-left corner of the worksheet.
- Open Home → Format → Row Height.
- Enter your preferred value.
- Click OK.
If you want to AutoFit all worksheet rows, select the entire sheet and double-click a boundary between two row numbers.
Be careful when resizing the entire sheet. The changes can affect rows outside your main data table.
When organizing a worksheet’s overall layout, you may also need to rearrange its columns. Our guide on how to move columns in Excel explains how to change their order without unnecessarily replacing data.
Excel Row Height Keyboard Shortcut
Excel for Windows includes a Ribbon access-key sequence for opening the Row Height dialog.
Shortcut: Alt, H, O, H
Follow these steps:
- Select the row you want to resize.
- Press
Alt. - Press
H. - Press
O. - Press
H. - Enter the desired row height.
- Press
Enter.
Press the letters one after another, not simultaneously.
This sequence opens the Row Height dialog in supported Windows desktop versions. It does not increase the row by a predetermined amount.
Mac and browser versions use different keyboard commands.
How to Increase Row Height in Excel on Mac
Excel for Mac supports the same basic mouse-resizing approach.
- Open your workbook.
- Locate the row you want to change.
- Point to the boundary below its row number.
- Drag downward to increase the height.
- Release when the row reaches the desired size.
Double-click the boundary to automatically fit the row’s contents.
For an exact measurement, select the row and use Format → Row → Height from the Mac menu, where available.
The Windows Alt, H, O, H sequence isn’t a universal Mac shortcut.
How to Change Row Height in Excel Online
You can also adjust row height in Excel for the web.
- Open your workbook in a web browser.
- Make sure the workbook is in editing mode.
- Locate the row heading.
- Point to its bottom boundary.
- Drag the boundary downward to increase the height.
You can also double-click the boundary to fit the contents in supported browser versions.
Depending on the interface, additional row-sizing controls may be available through the row menu or Home tab.
If a specific command isn’t visible, use the row boundary or open the workbook in the desktop application.
How to AutoFit Row Height After Wrapping Text
One common problem occurs when text wraps onto multiple lines but the row doesn’t expand enough to show everything.
For example, you might enter a complete mailing address in one cell. The text wraps, but the final line is missing.
Here’s how to fix it:
- Select the cell containing the long text.
- Go to Home → Wrap Text.
- Select the affected row.
- Open Home → Format → AutoFit Row Height.
- Check that all lines are visible.
Wrap Text controls how text flows onto multiple lines. AutoFit Row Height gives those lines enough vertical space.
If you’re unfamiliar with wrapping, follow our complete tutorial on how to wrap text in Excel to learn the steps and keyboard shortcuts.
Why Is Row Height Not Increasing in Excel?
If your row isn’t resizing correctly, check these common problems.
1. The Row Has a Fixed Height
A manually specified height may prevent all wrapped text from appearing.
Fix: Select the row and choose Home → Format → AutoFit Row Height.
2. The Cells Are Merged
Excel may not automatically calculate the required height for merged cells.
Fix: Adjust the height manually or reconsider whether the cells need to be merged.
3. You’re Dragging the Wrong Boundary
Dragging the edge of a column heading changes column width, not row height.
Fix: Use the lower boundary of the numbered row heading.
4. The Worksheet Is Protected
Sheet protection can restrict certain formatting changes.
Fix: If you have permission, check the worksheet’s protection settings or ask the owner to allow row formatting.
A row with zero height may be hidden from view.
Fix: Select the surrounding row headings, right-click, and choose Unhide.
For additional instructions, read our guide on how to hide rows in Excel, which also covers row visibility and restoring hidden rows.
6. Wrap Text Isn’t Enabled
Increasing the height doesn’t automatically turn a long single-line entry into multiple lines.
Fix: Select the cell and enable Home → Wrap Text.
7. The Row Reaches Excel’s Height Limit
Excel supports a maximum row height of 409 points.
Fix: Consider widening the column, reducing unnecessary spacing, or dividing a very long note into separate cells when appropriate.
8. Text Still Looks Cut Off
Large fonts, manual line breaks, narrow columns, and merged cells can affect how content appears.
Fix: Check the font size, wrapping, column width, and cell alignment before adjusting the row again.
AutoFit Row Height vs. Fixed Row Height
Both options are useful, but they serve different purposes.
| Feature | AutoFit Row Height | Fixed Row Height |
|---|---|---|
| Height determined by | Cell contents | Value you enter |
| Best for | Long or varying text | Uniform reports |
| When content changes | Can be recalculated | Stays at the chosen setting |
| Uniform appearance | Heights may vary | Heights match |
| Main limitation | Merged cells can interfere | Text may get cut off |
Use AutoFit for customer comments, addresses, and descriptions.
Choose a fixed height when consistent spacing matters more than fitting varied amounts of text.
How to Reset Row Height in Excel
If you’ve made a row unusually tall or short, you can return it to a standard size.
- Select the affected row.
- Open Home → Format → Row Height.
- Enter
15. - Click OK.
Fifteen points is Microsoft’s documented standard default, although some workbooks use a different default because of their formatting settings.
If you want the row to fit its contents instead, choose AutoFit Row Height.
Resetting to a fixed height and using AutoFit are not the same thing.
Does Increasing Row Height Affect Excel Formulas?
No. Increasing row height is a formatting operation.
For example, if cell D5 contains:
=SUM(B5:C5)
Changing the height of row 5 doesn’t change the formula or its calculation.
It only changes how the worksheet looks. However, row-height changes may affect printed page layouts.
Common Mistakes When Adjusting Excel Row Height
Avoid these mistakes when formatting your worksheet:
- Dragging a column boundary instead of a row boundary.
- Selecting AutoFit Column Width when you need AutoFit Row Height.
- Applying a fixed height to cells containing long wrapped text.
- Forgetting to enable Wrap Text.
- Expecting merged cells to AutoFit correctly.
- Resizing the entire worksheet when only a few rows need changes.
- Confusing points with pixels.
For most text-heavy worksheets, start by enabling Wrap Text and then use AutoFit Row Height.
Frequently Asked Questions
How do I increase row height in Excel?
Drag the bottom border of the row heading downward, or select Home → Format → Row Height and enter a larger value.
What is the shortcut for Row Height in Excel?
In supported Windows desktop versions, press Alt, H, O, H sequentially to open the Row Height dialog.
How do I automatically increase row height?
Select the row and choose Home → Format → AutoFit Row Height, or double-click its lower boundary.
How do I increase multiple row heights at once?
Select the rows, then drag the boundary of a selected row or enter a height through the Row Height dialog.
How do I make all rows the same height?
Select the entire worksheet, choose Home → Format → Row Height, and enter one value.
Why is AutoFit Row Height not working?
Common causes include merged cells, manually fixed row heights, and text-formatting issues.
What is the default row height in Excel?
Microsoft documents a standard default of 15 points, although workbook settings may change the actual default.
What is the maximum row height in Excel?
The maximum supported row height is 409 points.
Can I increase row height in Excel on Mac?
Yes. Drag the lower boundary of a row heading or double-click it to fit the contents.
Does changing row height affect formulas?
No. Row-height changes affect formatting, not the underlying formula calculations.
Conclusion
Increasing row height in Excel takes only a few seconds. Drag the bottom boundary of a row heading for a quick adjustment, or use the Row Height dialog when you need precise measurements.
For longer comments, addresses, and descriptions, AutoFit Row Height is usually the better choice because it adjusts the row to fit the content.
The right method depends on whether you want consistent spacing or enough room to display all your text clearly.

1 Comment
Pingback: How to Remove Table Formatting in Excel (4 Easy Ways)